Part 1 - Building Realtime Multiplayer Games with React and Roomservice
In this blog series I am going to create a realtime multiplayer game.
Features 
- 100% HTML and CSS game running in the browser for mobile, tablet and desktop. PART 1
- Realtime Multiplayer and Player vs. Player. PART 2
- Authentication and login for players.
- Lobbies for private and public games with unique shareable codes.
Part 1 
Prerequisites 
- NodeJS version 14.x
- A node build tool, I use
yarn
Setup 
I am going to use NextJS to build this game, its a production React stack that will ensure the finished application is performant.
I am going to call my game Roomies, you can pick any name 👍 Then, I am going to create it with the create-next-app command:
npx create-next-app roomiesNext, I would like to use typescript, so we will rename the files from js to ts and tsx.
This:
./pages/
├── api
│   └── hello.js
├── _app.js
└── index.js
becomes this:
./pages/
├── api
│   └── hello.ts
├── _app.tsx
└── index.tsx
Now, we can boot the app, for this run:
yarn devSince we have started using typescript, NextJS will let us know we have some missing dependencies and that we should install them, so to add those run:
yarn add --dev typescript @types/react @types/nodeDesigning the Game 
How are we going to build a game?
- The game is going to be multiplayer, and cross-platform, for desktop and mobile.
- We need to design the CSS to work on many different screens
- We need to have controls for a keyboard, and controls for a touch screen.
Game Board 
Lets start by removing everything else from pages/index.tsx
import Head from "next/head";
import styles from "../styles/Home.module.css";

export default function Home() {
  return (
    <div className={styles.container}>
      <Head>
        <title>NextJs Multiplayer Game</title>
        <link rel="icon" href="/favicon.ico" />
      </Head>

      <main className={styles.main}></main>
    </div>
  );
}
And we can keep just the container and main styles that were in the template in styles/Home.module.css:
.container {
min-height: 100vh;
padding: 0 0.5rem;
display: flex;
flex-direction: column;
justify-content: center;
align-items: center;
}
.main {
padding: 5rem 0;
flex: 1;
display: flex;
flex-direction: column;
justify-content: center;
align-items: center;
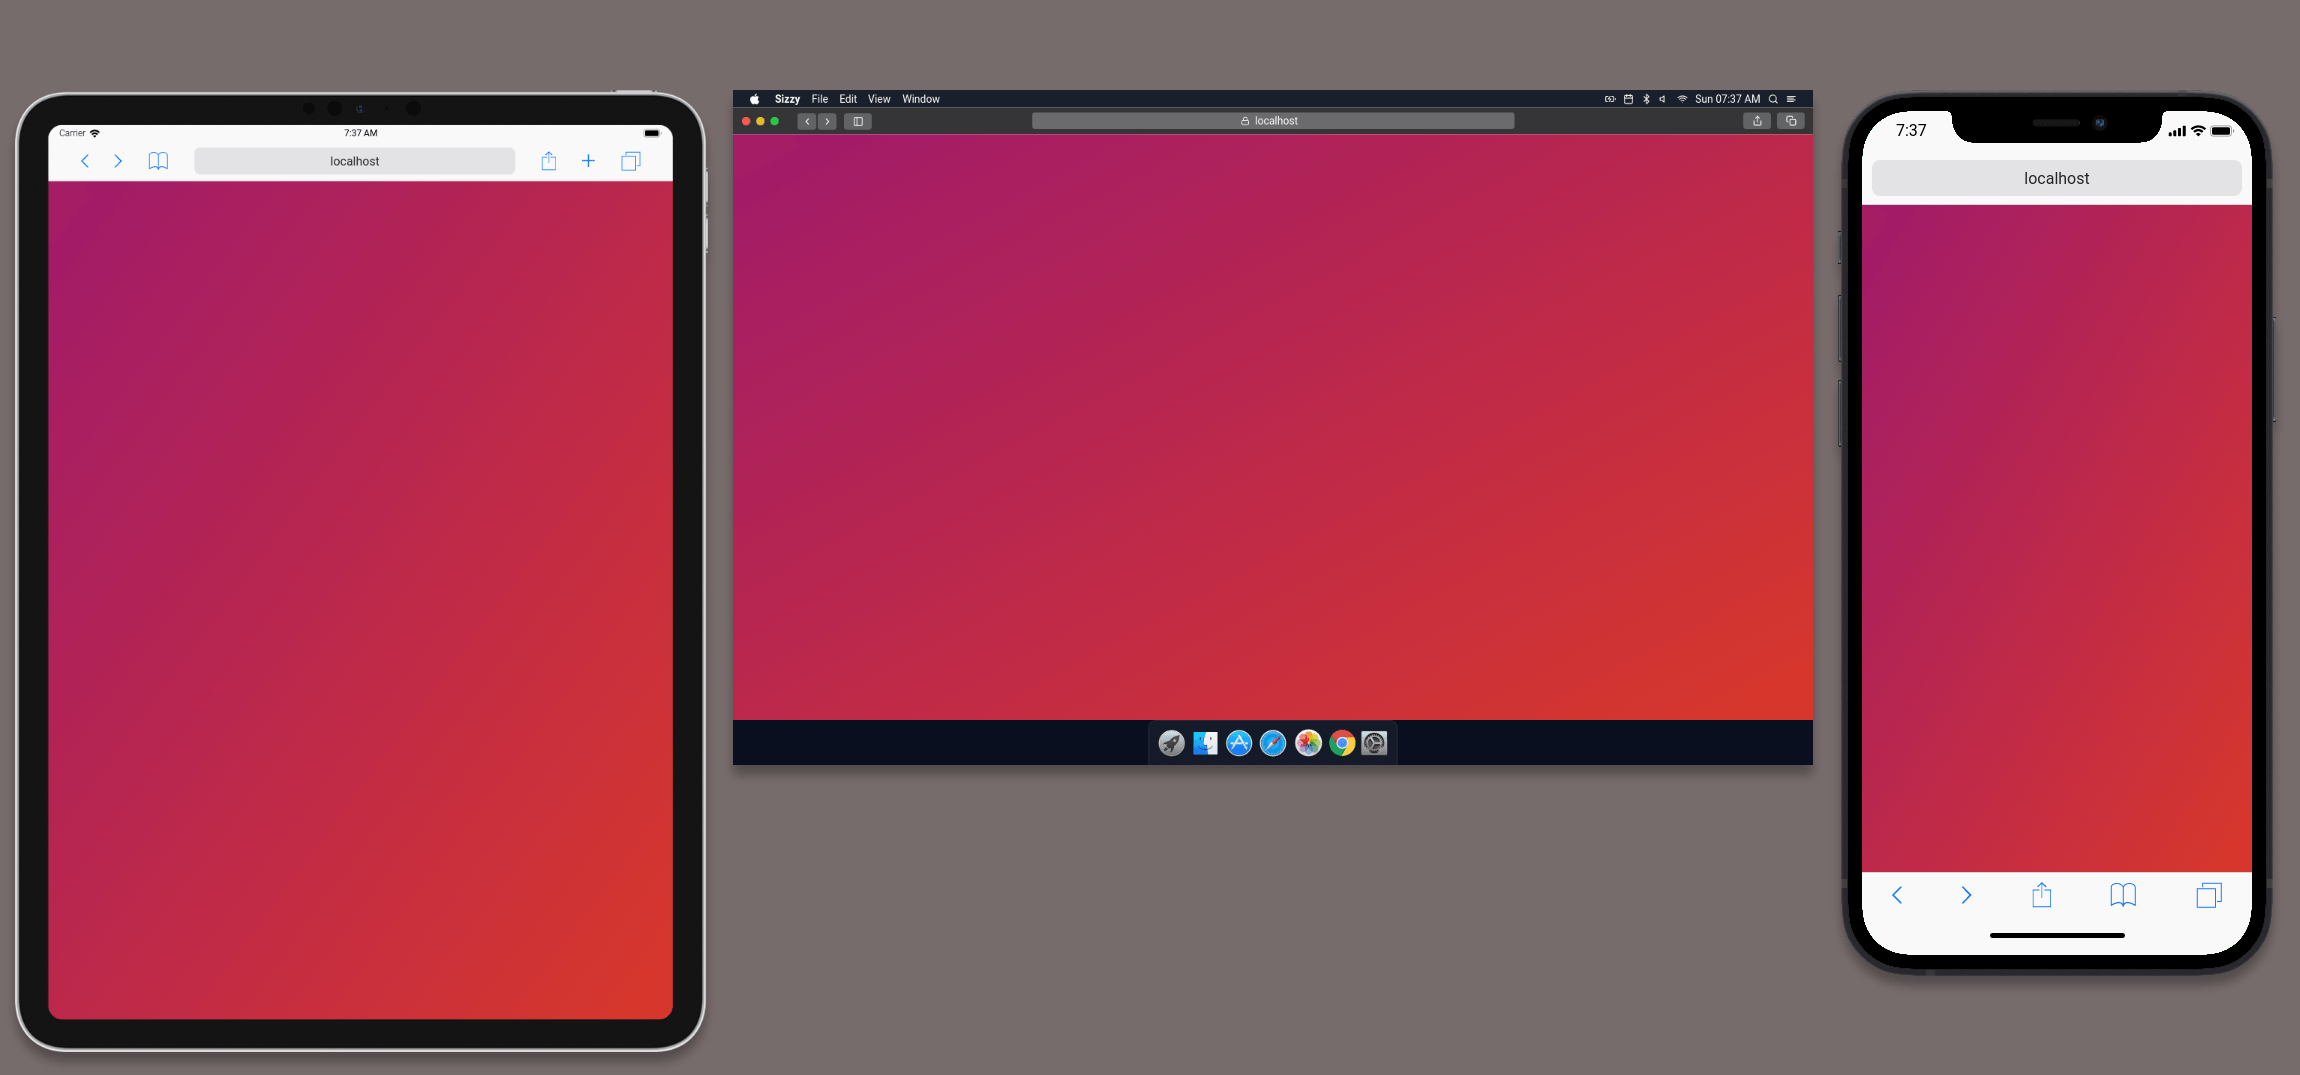
}Right now, the screen is a little plain, so lets add a gradient background to the .container class:
.container {
  min-height: 100vh;
  padding: 0 0.5rem;
  display: flex;
  flex-direction: column;
  justify-content: center;
  align-items: center;
  background: #a01a6a;
  background: -webkit-linear-gradient(top left, #a01a6a, #d83729);
  background: -moz-linear-gradient(top left, #a01a6a, #d83729);
  background: linear-gradient(to bottom right, #a01a6a, #d83729);
}
That looks nice for now:
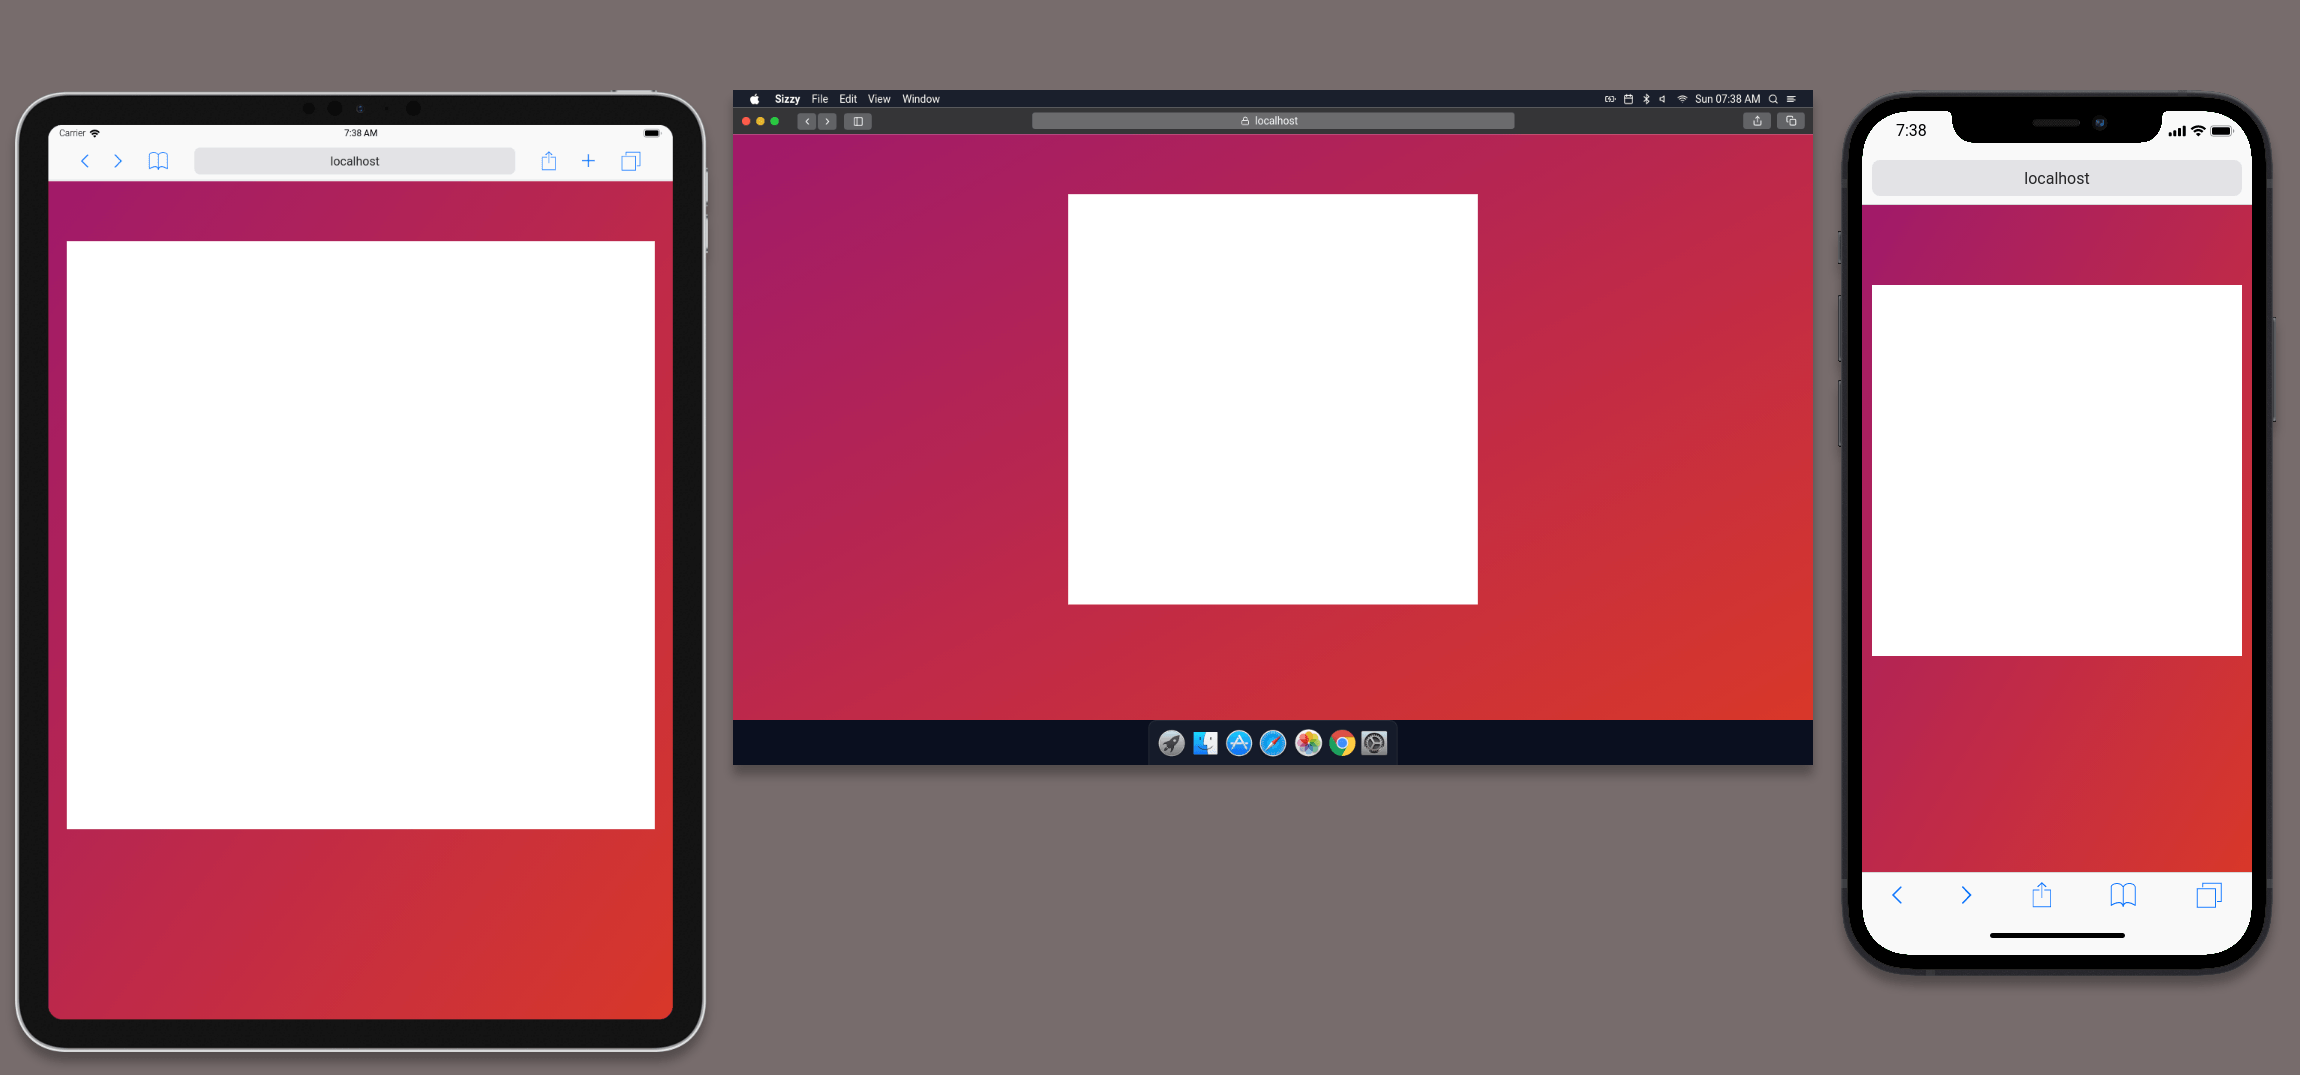
To add a board we want to have a square, which will contain the game. On desktop, we want the square to be large, and centered. On mobile, we want the square to be as large as the screen width, giving some room at the bottom.
To do this we will add a div with a board style like so:
<div
  className=
  id="board"
>
  { /* Space for players */ }
</div>
The style we need is the following:
/*
The board can be really wide, but it
should never be so wide as to go off
the bottom of the screen
*/
.board {
  width: 95vw;
  max-width: 70vh;
  background-color: white;
  /*
    This comes in handy for specifying the
    position of the players.
   */
  position: absolute;
}

/*
Set a padding bottom on the pseudo
after class to give the .board an
aspect ratio of 1:1
*/
.board:after {
  content: "";
  display: block;
  padding-bottom: 100%;
}
Lets take a look at that:
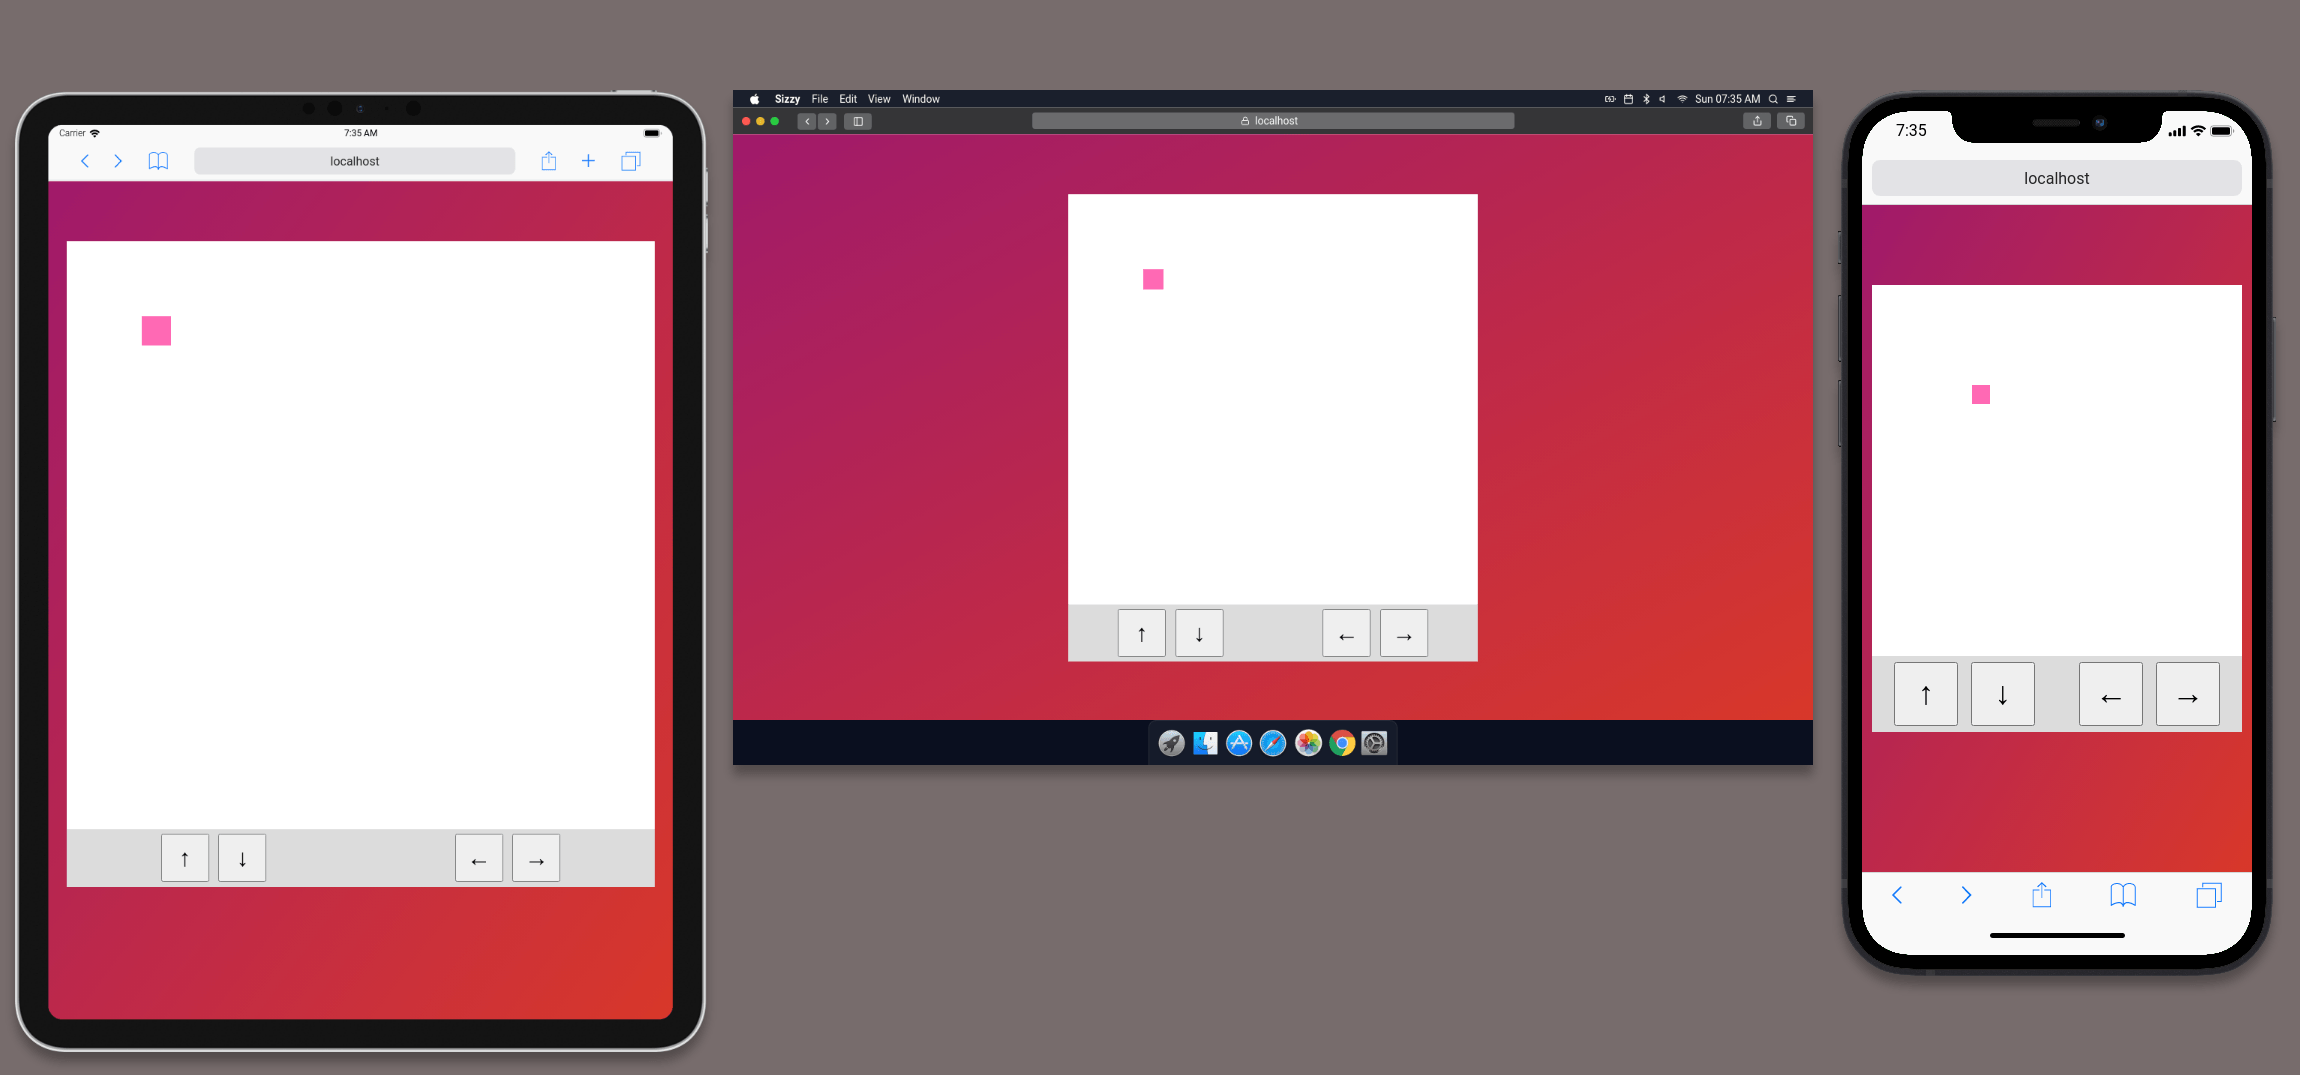
Players 
Putting players into the game will mean adding an element to the div board that we just created. For now we can add a single player to the board:
<div className={styles.board}>
<div id="current-player" className={styles.currentPlayer}>
</div>
</div>And the styles for that player are:
.currentPlayer {
  width: 5%;
  height: 5%;
  background-color: hotpink;
  display: inline-block;
  position: absolute;
}
Ok, so we have two squares, a big one, and a little one, lets make this seem more like a game.
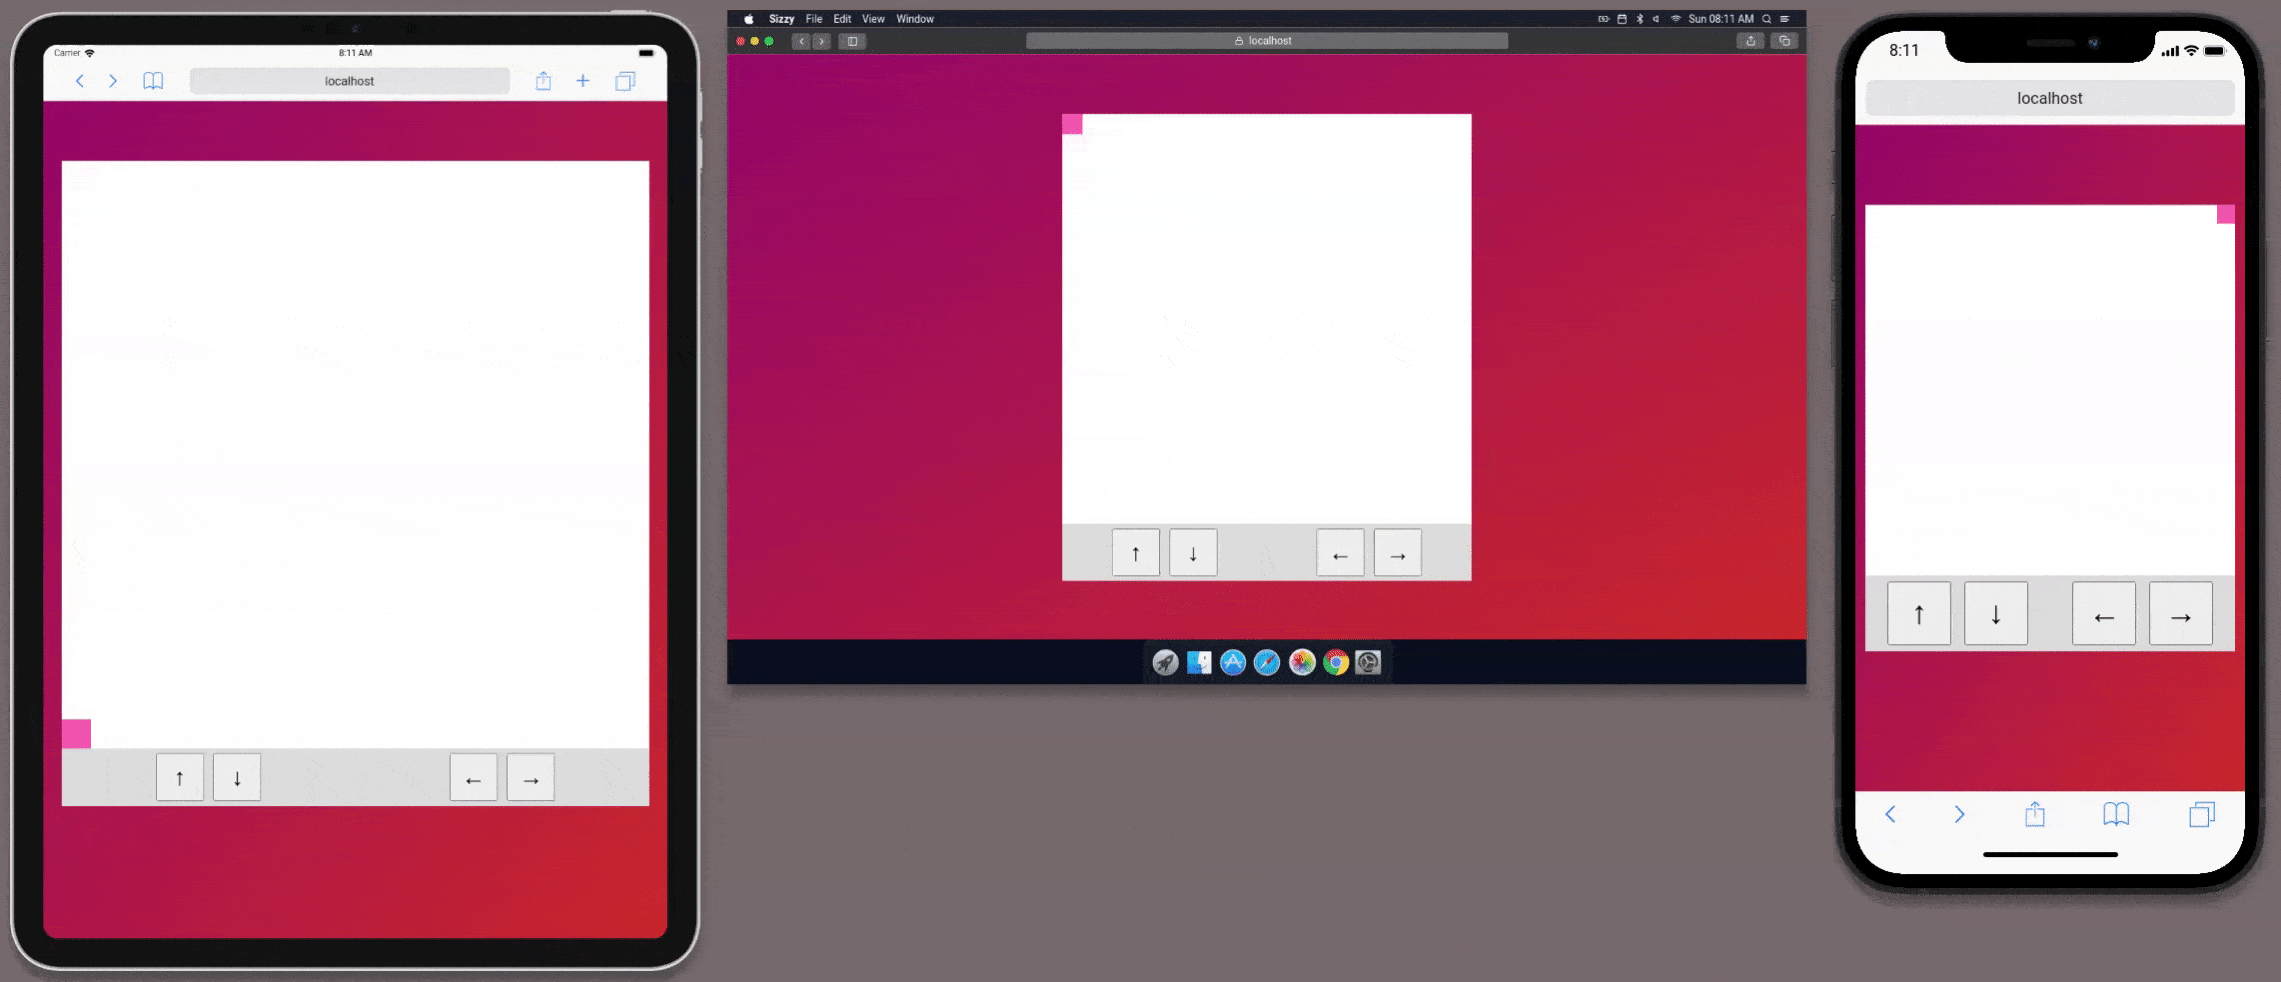
Controls 
The controls will allow players to move Up, Down, Left, and Right. They need to be close to the edges of the phone or tablet, so that a player holding the device can use them. They are not going to be the main source of control for keyboard and mouse users, because they will be able to use the arrow keys to control the board.
The controls can be added as a single component like so:
// ../../roomies/components/controls.tsx
import { SetStateAction } from "react";
import { Directions } from "../pages";
import styles from "./Controls.module.css";
export const Controls = ({
directions,
setDirections,
}: {
directions: Directions;
setDirections: React.Dispatch<SetStateAction<Directions>>;
}) => {
const setDirection = (actionName, value: boolean, e: MouseEvent) => {
e.preventDefault();
setDirections((currentDirections) => ({
...currentDirections,
[actionName]: value,
}));
};
const ButtonAction = (actionName: keyof Directions) => ({
onMouseDown: (e) => setDirection(actionName, true, e),
onTouchStart: (e) => setDirection(actionName, true, e),
onMouseUp: (e) => setDirection(actionName, false, e),
onMouseLeave: (e) => setDirection(actionName, false, e),
onTouchEnd: (e) => setDirection(actionName, false, e),
});
return (
<div className={styles.controls}>
<div className={styles.upDownControl}>
<button className={styles.control} {...ButtonAction("ArrowUp")}>
↑
</button>
<button className={styles.control} {...ButtonAction("ArrowDown")}>
↓
</button>
</div>
<div className="left-right-control">
<button className={styles.control} {...ButtonAction("ArrowLeft")}>
←
</button>
<button className={styles.control} {...ButtonAction("ArrowRight")}>
→
</button>
</div>
</div>
);
};I have added a number of event listeners to each of the buttons so that we can account for different types of interaction.
Finally I need to add some CSS for these, which I will do as a module, NextJS supports this, so I can add the file next to the controls component:
├── components
│   ├── Controls.module.css
│   └── controls.tsx
And inside I will add the styles:
/* ../../roomies/components/Controls.module.css  */

.controls {
  background-color: gainsboro;
  width: 100%;

  display: flex;
  flex-direction: row;
  align-items: center;
  justify-content: space-around;
}

.control {
  font-size: 2em;
  height: 2em;
  width: 2em;
  margin: 0.2em;

  /* Prevent touch highlighting */
  -webkit-touch-callout: none;
  -webkit-user-select: none;
  -khtml-user-select: none;
  -moz-user-select: none;
  -ms-user-select: none;
  user-select: none;
  -webkit-tap-highlight-color: rgba(0, 0, 0, 0);
}

.up-down-control {
  display: flex;
  flex-direction: column;
}
Now we can take a look at how our game is shaping up:
Connecting our Player to the Controls 
Ok, so we have a board, a player, and a set of controls.
Now, we want to connect our player to the controls, and use the controls to move around the board.
First, we need to calculate the players positions:
- The player will start at (0,0) when they join.
- The player will be able to move every 20ms depending on which directions they are pressing.
Set the initial player positions and directions:
const [top, setTop] = useState<number>(0);
const [left, setLeft] = useState<number>(0);
const [directions, setDirections] = useState<Directions>({
  ArrowUp: false,
  ArrowDown: false,
  ArrowRight: false,
  ArrowLeft: false,
});
Now we can map the player to those positions using the style in React:
const style = { top, left }

<div
  ref={player}
  id="current-player"
  className={styles.currentPlayer}
  style={style}
></div>
So far so good, we have a player with a fixed position inside the UI. Now, we need to compute the position of the player and set it on the element when the player is pressing the arrow keys of the keyboard.
To calculate the new position we can write a small helper function:
const newPositionOnBoard = (
  currentPositionOnBoard: number,
  movementDistance: number,
  maxPosition: number,
  lowerArrowKeyName: string,
  upperArrowKeyName: string
): number => {
  const calculatedNewPosition =
    currentPositionOnBoard -
    (directions[lowerArrowKeyName] ? movementDistance : 0) +
    (directions[upperArrowKeyName] ? movementDistance : 0);

  if (calculatedNewPosition < 0) return 0;
  if (calculatedNewPosition > maxPosition) return maxPosition;

  return calculatedNewPosition;
};
Now, we need to calculate this position at a regular interval, and then set the state variables of top, and left to update the position on the board:
useEffect(() => {
  if (typeof window !== "undefined") {
    // Register key presses
    document.body.addEventListener("keydown", function (e) {
      directions[e.key] = true;
    });
    document.body.addEventListener("keyup", function (e) {
      directions[e.key] = false;
    });

    // Prevent travel outside the bounds of the box
    const maxPosition = board.current.offsetWidth - player.current.offsetWidth;
    // Travel distance as percentage of the total container size, makes speed
    // the same on all device sizes
    const movementDistance = board.current.clientHeight * 0.005;

    const interval = setInterval(() => {
      setLeft((left) =>
        newPositionOnBoard(
          left,
          movementDistance,
          maxPosition,
          "ArrowLeft",
          "ArrowRight"
        )
      );
      setTop((top) =>
        newPositionOnBoard(
          top,
          movementDistance,
          maxPosition,
          "ArrowUp",
          "ArrowDown"
        )
      );
    }, 20);
    return () => clearInterval(interval);
  }
}, [directions]);
And, we need to ensure that we render our controls, with the directions that we have stored in state. This means that the child component can update the state of the directions. So we need to pass in the directions and the setDirection hook into the <Controls /> component:
<Controls {...{ directions, setDirections }} />Now that we have put all that together we have a working single player game, although, there is no objective yet 😞
Preview Deployment 
I think we should deploy this application now, because, we have a working MVP and we need to ensure that we can ship it to development before we have done too much work.
I am going to use Vercel to deploy the site. You can sign up for an account and connect your github account. Follow the setup instructions to connect your github account to vercel and deploy the application as a Next.JS site.
Wrap Up 
That is all for Part 1, I think its a good time to take a break from the application.
If you need the full source code for the application it is here:
In the next Part we will add multiplayer to the game using https://www.roomservice.dev/